
Potting & Soil Mixes
Mixing Perlite with Potting Soil: Ratios and How-To
The short answer
Mix perlite into potting soil at roughly 1 part perlite to 3 or 4 parts soil for general houseplants, or closer to 1:1 for succulents and cacti, blending it in dry before adding water so it distributes evenly.
Last updated September 2026
| General houseplants | About 1 part perlite to 3-4 parts soil |
|---|---|
| Succulents and cacti | About 1 part perlite to 1 part soil |
| Seedlings | Smaller amount, roughly 1 part to 5-6 parts |
| Mixing method | Blend dry, then moisten |
| When to skip it | Mix already contains enough drainage material |
Scroll for more →
What's covered14
- Why add perlite to potting soil
- Basic ratios for different plants
- How to mix perlite into potting soil
- Dealing with perlite dust
- Signs you've added too much or too little
- When you can skip adding perlite
- Perlite alternatives if you're mixing your own
- Buying perlite for mixing
- Perlite vs vermiculite: which to mix in
- Testing your mix after adding perlite
- Mixing perlite into an already-potted plant
- Using perlite as a top layer or mulch
- Storing leftover perlite
- Frequently asked questions
Your choice of mixing perlite with potting soil affects water and air around the roots. Compare mixing perlite with potting soil by drainage, water storage, and fit for the plant. Use this mixing perlite with potting soil guide to see the main trade-offs.
- Mixing perlite with potting soil at roughly 1 part perlite to 3 or 4 parts soil works well for general houseplants, or closer to a 1:1 ratio for succulents and cacti that need faster drainage. Blend the two dry before adding water so the perlite distributes evenly through the mix rather than clumping in one area.
Why add perlite to potting soil
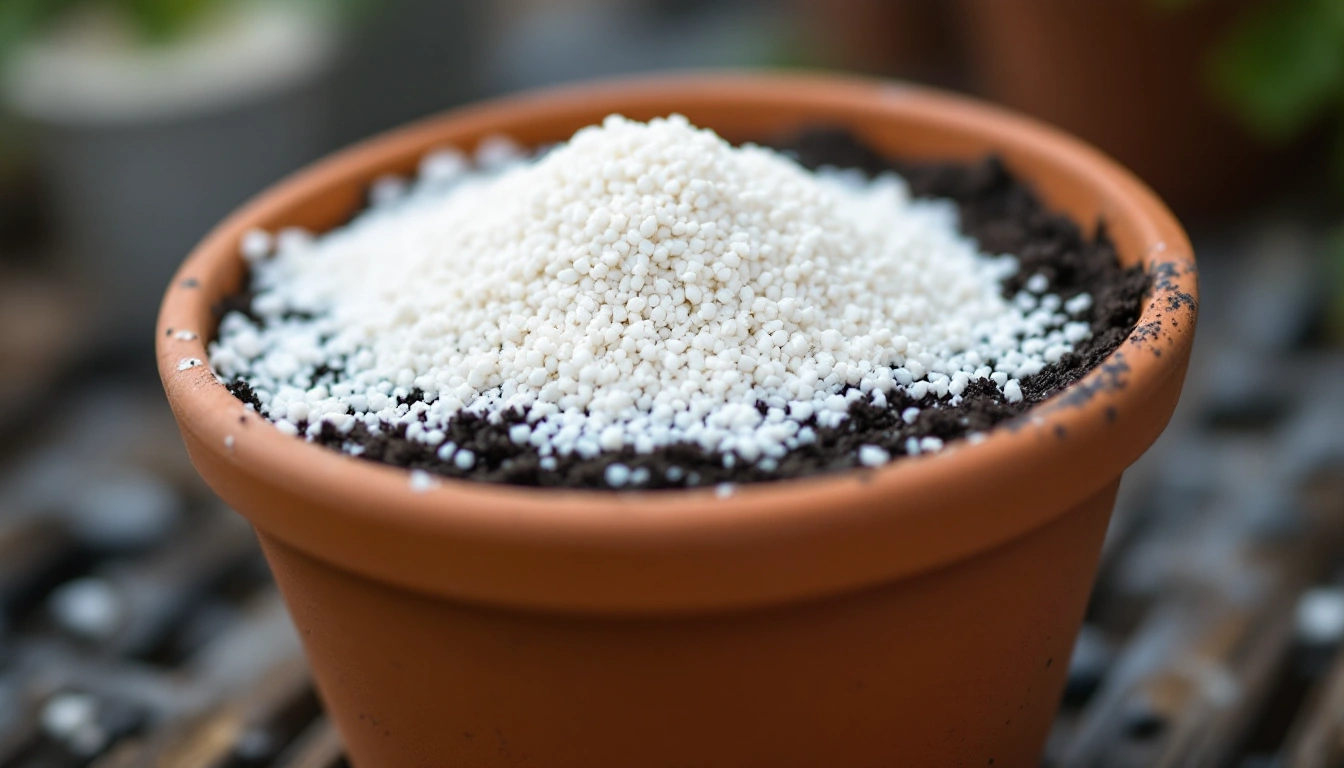
Perlite is a lightweight, popped volcanic glass that creates permanent air pockets in soil. Adding it to potting soil improves drainage and aeration, which helps prevent the soil from compacting and staying waterlogged after repeated watering. Roots need oxygen as much as they need water, and a mix that stays dense and soggy for too long can suffocate roots and lead to rot.
Many bagged potting soils already include some perlite, but the amount varies a lot between products, and some plants benefit from adding more than what comes standard in a general-purpose bag.
Basic ratios for different plants
There's no single correct ratio, since the right amount of perlite depends on what you're growing and how fast-draining you want the mix to be.
General houseplants (pothos, philodendron, peace lily, and similar): a ratio of about 1 part perlite to 3 or 4 parts potting soil works well for most common houseplants. This adds noticeably better drainage without making the mix so airy that it dries out too fast.
Succulents and cacti: these plants want much faster drainage, so a ratio closer to 1 part perlite to 1 part soil, or even more perlite relative to soil, better matches how they grow in the wild.
Seedlings and young plants: a lighter touch works better here, around 1 part perlite to 5 or 6 parts soil, since very young roots benefit from more consistent moisture contact than a heavily aerated mix provides.
Aroids like monstera and philodendron: some growers use a slightly higher ratio than standard houseplants, closer to 1:2 or 1:3, sometimes combined with bark chips for even more aeration, since these plants are used to growing on trees with roots exposed to air.
How to mix perlite into potting soil
- Measure your ingredients. Decide on your target ratio and measure out the potting soil and perlite using the same container for both, such as a scoop, cup, or small pot, so the proportions stay consistent.
- Combine while dry. Pour both materials into a bucket, tub, or tray and mix them together before adding any water. Perlite distributes more evenly when it's dry rather than trying to stir it into already-wet soil.
- Mix thoroughly. Use your hands or a small trowel to fold the two materials together until the perlite granules are spread evenly throughout, without visible clumps of pure soil or pure perlite.
- Moisten before potting. Lightly dampen the finished mix before potting your plant, since bone-dry peat or coir components in the soil can resist absorbing water at first.
- Pot as usual. Fill your container with the finished mix and plant as you normally would.
Dealing with perlite dust
- Dry perlite can produce fine dust, especially when handled or poured. Working in a well-ventilated area, wearing a basic dust mask, and lightly dampening the perlite before mixing can all reduce how much dust becomes airborne. Some growers rinse perlite in a colander before mixing it in, which removes surface dust without meaningfully changing how the perlite performs in the soil.
Signs you've added too much or too little
Too much perlite shows up as soil that dries out very quickly, sometimes within a day or two even for plants that normally hold moisture longer. You may also notice perlite granules floating to the surface after watering, or the mix feeling unusually light and loose with little structure holding it together.
Too little perlite shows up as soil that stays wet for a long time after watering, sometimes developing a sour smell, visible mold, or attracting fungus gnats. The mix may also feel dense and compacted rather than loose and crumbly when you squeeze a handful.
If you notice either issue, it's usually easier to adjust at the next repotting rather than trying to rework perlite into an already-potted plant's soil.
When you can skip adding perlite
- Not every potting project needs extra perlite. If you're using a bagged mix that already contains a generous amount of perlite, bark, or pumice, and it drains well within a few seconds to a couple of minutes after watering, there's no need to add more. Plants that specifically prefer consistently moist soil, such as some ferns or peace lilies, may also do better with less aeration material than a succulent or cactus would need, so it's worth matching the ratio to the plant rather than defaulting to maximum drainage in every pot.
Perlite alternatives if you're mixing your own
- If perlite isn't available or you'd prefer an alternative, pumice serves a very similar function and has the advantage of being heavier, so it's less likely to float to the surface or wash out of the pot over time. Coarse sand can also add some drainage in smaller amounts, though it doesn't create the same air pockets that perlite and pumice do. For plants like orchids and some aroids, bark chips add aeration in a different way, creating larger gaps rather than perlite's fine, even distribution.
Buying perlite for mixing
- Perlite is sold in bags of varying sizes at garden centers and hardware stores, and it doesn't expire or break down chemically over time, so buying a larger bag to use across multiple repotting projects is often more economical than buying small amounts repeatedly. A bag of perlite sized for how many pots you're working on will cover most home mixing projects for a long while, since only relatively small amounts are needed per pot.
Perlite vs vermiculite: which to mix in
Perlite and vermiculite are often confused, but they behave differently once mixed into soil. Perlite is about drainage and aeration, it doesn't hold water itself and creates air pockets that let excess moisture pass through faster. Vermiculite does the opposite: it absorbs and holds water, increasing the mix's overall water retention rather than its drainage.
If your goal in mixing something into potting soil is faster drainage and less compaction, perlite is the right choice. If your goal is more even moisture retention, for example in a seed-starting mix, vermiculite or a combination of both, used in smaller amounts, may serve you better. For most of the ratios discussed on this page, aimed at improving drainage for common houseplants, succulents, and aroids, perlite is the more direct fit.
Testing your mix after adding perlite
Once you've blended perlite into a batch of potting soil, it's worth testing the result before committing a plant to it, especially if you're unsure about the ratio. Fill a spare pot with the mix, water it thoroughly, and time how long it takes water to run out the drainage hole. For a general houseplant mix, a drain time of a few seconds up to a couple of minutes is typical. If water pools on the surface for many minutes or sits without draining at all, the mix likely still needs more perlite relative to soil.
You can also do a simple squeeze test: take a damp handful of the mixed soil and squeeze it gently. It should hold together loosely and then break apart easily when you open your hand. A mix that stays in a dense, sticky clump usually needs more perlite; a mix that has no cohesion at all and falls apart into dry crumbs may have too much.
Mixing perlite into an already-potted plant
- Adding perlite to a plant that's already potted is more difficult than mixing it in beforehand, since you can't blend it evenly into soil that's already packed around established roots. The most reliable approach is to wait for a planned repotting, remove the plant, gently shake or tease off as much old soil as you comfortably can without damaging fine roots, then pot into a freshly mixed batch with the perlite ratio you want. Trying to work perlite into the top layer of an already-potted plant only affects that top layer and won't meaningfully change drainage lower in the pot where most of the root ball sits.
Using perlite as a top layer or mulch
- Beyond mixing it directly into soil, a thin layer of perlite spread across the surface of a pot can help reduce surface moisture and slow the growth of algae or fungus gnats, which are often drawn to consistently damp topsoil. This is a secondary use compared to mixing it in throughout the mix, but it's a simple option if you want to dial back surface moisture without fully repotting a plant.
Storing leftover perlite
- Perlite doesn't decompose, expire, or lose its function in storage, so leftover perlite from a mixing project can be kept indefinitely in a sealed bag or container. Keeping it dry and out of direct exposure to the elements prevents it from becoming waterlogged or growing algae if left open outdoors for long periods, though as an inert mineral material it won't rot or attract the kind of pests that organic ingredients sometimes do.
Frequently asked questions
- Getting the perlite ratio right comes down to matching the mix to the plant: less for moisture-loving foliage and seedlings, more for succulents, cacti, and aroids that want their roots to dry out and breathe between waterings. Mixing it in dry, before adding water, is the simplest way to get an even blend every time.
FAQ
How much perlite should I add to potting soil?
A common starting ratio is one part perlite to three or four parts potting soil for general houseplants, and closer to a 1:1 ratio for succulents and cacti that need much faster drainage.
Can I add too much perlite to potting soil?
Yes. Too much perlite relative to organic matter can make the mix dry out too quickly and hold too little water and nutrients between waterings, especially for plants that prefer consistent moisture.
Does perlite go bad or wear out over time?
No, perlite is an inert mineral material and doesn't decompose or break down chemically. It can crumble slightly from repeated handling over years, but it doesn't expire or lose its function the way organic ingredients can.
Should I rinse perlite before mixing it in?
Rinsing isn't required, but it removes fine dust that can otherwise become airborne while mixing. Some growers also lightly dampen perlite before mixing since dry perlite can float to the surface when watered.